Watermarker
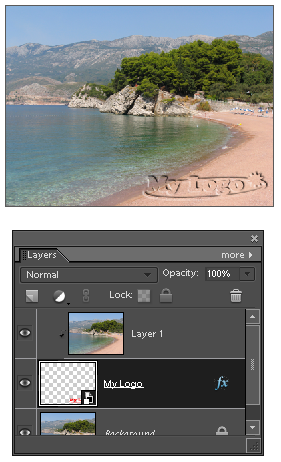
![]() The "Watermarker" script creates a "carved" watermark from a "logo" file on your computer.
The "Watermarker" script creates a "carved" watermark from a "logo" file on your computer.
- Prepare a layered document that will define the logo shape and save it as on your computer (sample logo is available here).
- Open the "Scripts" dialog and run the "Watermarker" script.
- In the dialog box that opens, browse to the saved "logo" file and click "OK".
- The logo appears in the bottom right corner of the document. Press [Ctrl+T] and adjust the new layer size and position.
- If necessary, double click the "fx" icon on the "logo" layer and alter the effect settings.
To watermark multiple images, you use the "Batch" tool:
- Open any image.
- Run the "Watermarker" script, choose a "logo" file and click "OK". This makes the script to remember the logo source file location.
- Call the "Batch" dialog.
- Choose for execution the "Watermarker -batch edition" script.
- Choose the source directory and "Destination" options.
- Click the "Run" button to start the batch processing.
