Quick (temporary) masks let you edit selection with any painting tools.
- In the Effects panel, double-click the "Quick Mask Mode" thumbnail. In case a part of the image has been selected at the moment, now it is covered with red overlay*. The current layer in the Layers palette is grayed out, which means that in this mode, any tools and commands only affect the quick mask and not the image itself.
- Activate the Brush tool and and paint with black color to select some area. The selection is indicated as a red overlay. To deselect, you paint on the quick mask with white color*.
*Masking and selecting colors may vary depending on your choice in the "Quick Mask Options" dialog (see below).
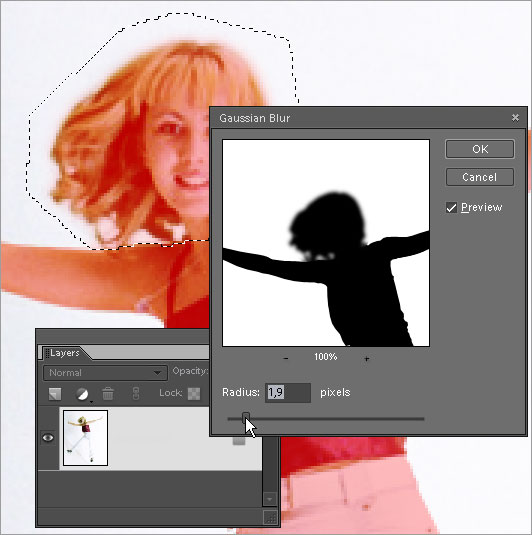
- To soften the selection edges, paint / erase with soft brushes, reduce stroke opacity, or "feather" your mask with the "Gaussian Blur" filter (screenshot).
- To only edit a specific portion of the mask you may pre-define it, e.g., with the Polygonal Lasso tool.
 By default, the red overlay indicates the selected areas. However, you may apply the "Quick Mask Options" effect, and choose the "Masked Areas" option. Additionally, the "Options" dialog lets you change overlay color or density.
 At last, to use the created mask, you have to return to the normal editing mode by double-clicking the "Exit Quick Mask" effect. The quick mask turns to selection and you can edit the selected portion of the image.